
It’s supposed to save you money. Choosing to complete that project yourself, apart from earning you a good pat on the back should always save you money. The idea of DIY is that you save money on the labour costs of hiring a professional. Sometimes, DIY costs can turn into a nightmare if you don’t keep a close eye on your spend. Here are expert tips on keeping DIY costs down on your way to your dream home.
Plan everything to the last detail
Planning your DIY projects poorly can make you lose track of the finer details, which will inevitably lead to you breaking your budget. Make sure you plan and research each part thoroughly before you jump in.
Understand and define exactly what the job is, what tools you need and honestly assess if you’re qualified to carry it out. It’s amazing how minor things you hadn’t thought of can creep up halfway through a project’s completion.
For example, do you need an entire toolbox, or should you simply borrow a screwdriver and a hacksaw which is all you’ll need?
Get professional advice early
It may be wise to get professional advice especially during the planning stage. The last thing you want is for you to run our of materials, or come across a problem you should be prepared for but aren’t.
A professional has the benefit of years of experience and should be able to plug potential loop holes in your plan. If you need to apply for planning permissions or other regulatory approvals from your local council, they will also advise on the necessary steps to take.

Check the terms and conditions of your home insurance
Obviously, repairing the kids bedroom shouldn’t affect your insurance. But knocking down a wall to create more space or reinstalling a new bathroom yourself certainly will. Any jobs that require a change in the floor plan of your home would require a conversation with your insurers. Accidents can happen, you could hit a drainage pipe or cause a plumbing leak that may not be covered by your insurer.
Some jobs aren’t DIY
We must emphasise that if a job requires rewiring electrics or working with gas or your boiler in anyway, it’s advisable not to take them on yourself. In fact, it may even be illegal to do so. You could seriously jeopardise your safety and the safety of those in your home if you make a gas or electrics related mistake. Research shows that Britons can spend up to £2,000 on average hiring professionals to fix botched DIY jobs. In the interest of safety and keeping DIY costs down, be careful.
Keep DIY Costs low by taking advantage of sales
Finally, with black Friday and Christmas offers coming up, DIY home and gardening stores are holding massive sales you can take advantage of. There’s no better way to keep DIY costs down than by taking advantage of sales. Even if you’re not ready to start your project, browse through the online and in store sales so you can purchase necessary materials and tools and put them away for later.
1 BOILER = 1 TREE
Trees for Cities will plant a tree for every boiler you install with us.
Ever since we started this company 15 years ago, our driving motto has been to take care of our customers. To deliver the best possible service, add value and do our bit to make our customers lives better. We’ve always known that we work in an industry that is by its very nature, carbon negative.
Now, much has been done by the UK government and most boiler manufacturers to increase the energy efficiency of gas boilers. Most new boilers are up to 70% more efficient than they were 50 years ago. But the negative impact of heating appliances are still the second largest contributor to a household’s carbon footprint.
We’ve decided to do something about it.

We will plant a tree for every boiler you install with us.
It’s important to us to become a sustainable business. So we’re doing as much as we can. We don’t want our existence to be fundamentally harmful to our environment. That’s why we’ve decided to partner with Trees for Cities. With every boiler we install, we will plant a tree. That’s our commitment. We will do something, even if the problem of climate change is too big for us to tackle, we believe everyone should take small steps and do something.

Our Partnership with Trees for Cities
Trees for cities are the only UK charity working both nationally and internationally to create greener cities. So far, they’ve planted 801, 351 trees.
As well as working to make cities greener, they also do significant work to educate children about their environment and healthy eating. They’ve worked to educate more than 11,200 school children about trees and ways they could contribute to a healthy environment.
Over to you
Now it’s your turn. Installing a boiler with us means that you’re planting a tree to offset your carbon footprint. Get a quote now to see what your boiler will cost and you can leave the tree planting to us.
If you want to match our pledge to save the planet one tree at a time, visit Trees for cities and click the donate button to contribute to planting more trees. Hey, it’s a great idea for a birthday gift.
Bathroom condensation: damp walls in the bathroom are perfect breeding grounds for bacterial mould. Mould (also called mildew) is an unsightly fungus that develops on top of walls, as well as burrowing beneath a wall’s surface, often causing a structure to crumble, or paint and wallpaper to peel. Health issues, such as respiratory infections, allergies and asthma, can also arise as a result of mould, with babies, children and elderly people being most susceptible.
How does bathroom condensation occur?
Bathroom condensation is the result of hot air colliding with cold walls.
It’s common to notice dripping walls after taking a hot shower or bath, but most cases occur in the wintertime when we ramp up the central heating to counteract the chill our homes suffer from the cold winds and temperatures outside.
How to prevent bathroom condensation

There are a number of preventative measures that you can take to reduce condensation forming in your bathroom, including:
Repaint walls with specialist, low-moisture paint.
When running a bath, run the cold tap first. This will dilute the hot water so it won’t sit around heating up your bathroom for too long.
Keep your bathroom window open for as long as possible before, during and after your bath or shower.
Install an extractor fan to get rid of steam.
Try to maintain a constant temperature inside your home to avoid the erratic mixture of cold and warm air.
When it gets misty, wipe down your radiators and towel heaters to bring more drying heat in to your bathroom.
Use an old towel to dry your walls whenever condensation occurs.
Don’t dry wet clothes on your radiators or towel warmers because this will circulate moist air around the room.
Leave a small gap between any furniture and your walls so as not to trap warm air in the spaces.
Check that your guttering and down pipes are not damaged or blocked, thus prevented from carrying water away.
If these tips do not reduce condensation, a bathroom repair may be necessary. Under such circumstances, always enlist the assistance of a plumbing professional to prevent putting your safety at risk, or causing further damage.
Even though temperatures have cooled dramatically this weekend, the heatwave is set to return with a vengeance this week as temperatures climb back up to 30º C this Friday. Experts are predicting higher than normal temperatures over autumn, its more important than ever that we look after ourselves while it’s super hot. In Britain, homes are designed to keep us warm, so we have to take extra care to avoid health risks.
Stay hydrated in the heatwave
The first and most important, is to stay hydrated during the heatwave. It may seem obvious but you’ll be sweating a lot and all that water lost needs to be replaced. Especially when travelling on the tube, make sure you carry a refillable bottle of water with you that you can take sips from throughout the day. Avoid single use plastic bottles – they’re harmful to the environment.
Buy a fan
Whether hand held, table or standing, investing in a fan may actually come in handy over the long term. It’s no secret, the earth is heating up, so it’s likely heatwaves may become the new norm. For extra cool in the air, but a bowl full of ice in front of the fan while it’s on.
Wear Sunscreen, it’s a heatwave!
While this might seem like an extra thing to do before leaving your house in the morning, keep your factor 50 because you’ll be needing it a lot more. It’s been the hottest summer since 1976 so far. While it’s fun to hang around in the sun, heat stroke and sunburn aren’t any fun, so take care of yourself.
Stay out of the sun
While we can complain about the “nanny state” in the UK for telling us last week to “stay out of the sun”. But there is a point to it. There’s a reason warmer countries like Spain have siestas. High temperatures in this heatwave can be particularly dangerous for older people, the young and those with long term health conditions. On particularly hot days, stay out of the sun between 11am and 3pm, when the sun is at its highest point.
Heatwave cooldown
Buy a cooling Pillow
Yes, they exist. Ever flipped your pillow over for that “aahhhh” feeling during a hot summer’s night? Then this is just right for you. They’re available on amazon.
Eat foods with a high water content
Eating ice cream on a hot day might seem like the obvious thing to do. But it may actually make you feel worse afterwards. Your body gives off a lot of heat while it’s working hard to break down rich foods like ice cream. Refreshing options are things like cucumbers, strawberries, watermelons, sweet bell peppers and celery.
The point is, enjoy yourself, but keep things cool.
Spring cleaning! Summer is approaching and the season of barbecues and garden parties is upon us. It’s time to declutter and and air out your home.
Throw old things away and start fresh. Let’s get started:
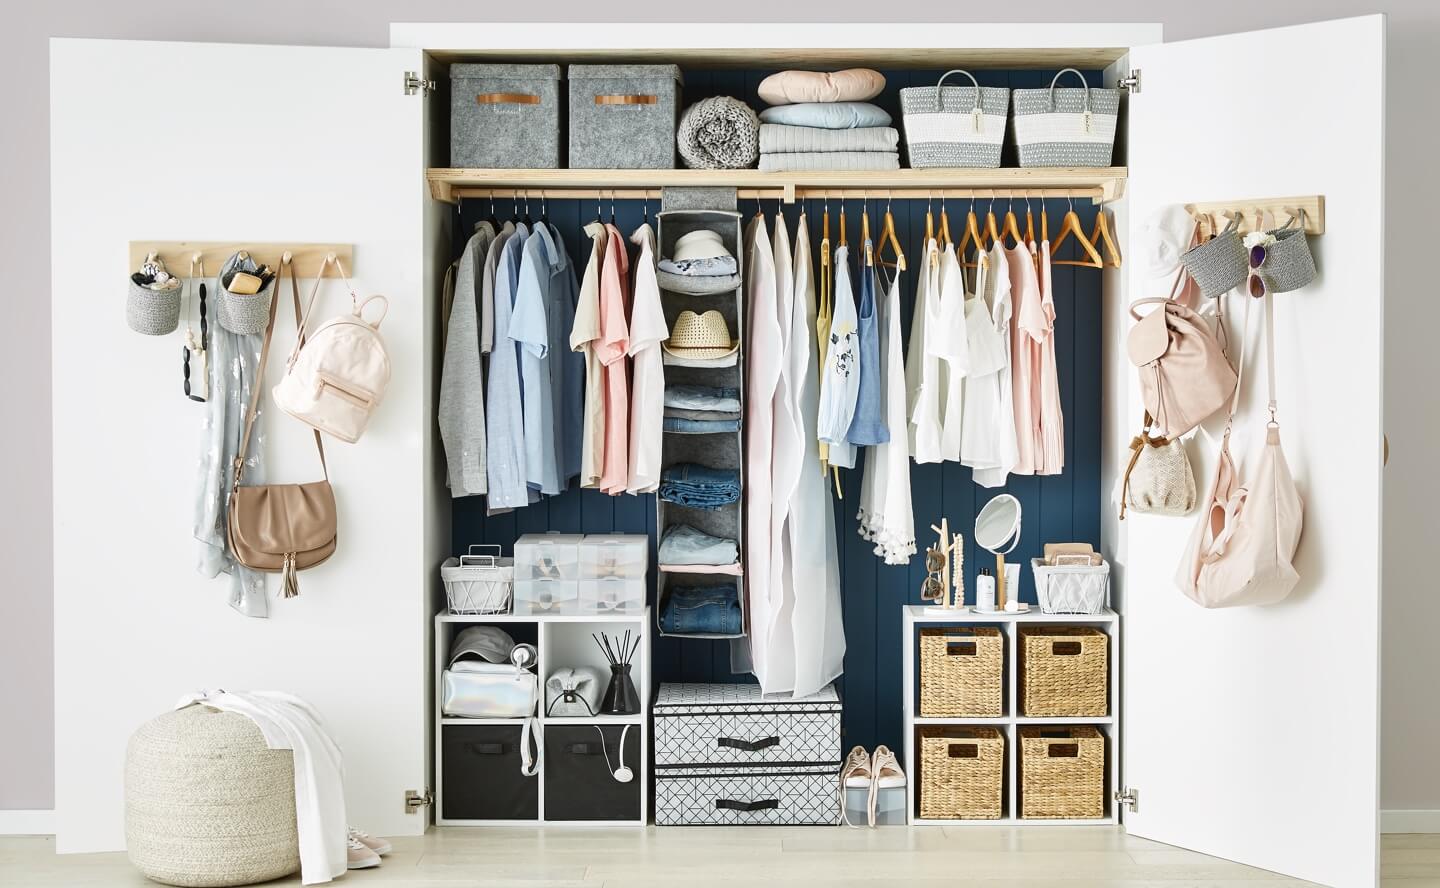
Spring Cleaning: Your Closet
Firstly, clothes are the hardest to give away. Somewhere in the back of your mind you’re thinking, “I’ll soon fit into that again” or “I’ve only worn that once”. So you refuse to throw away that spandex looking skirt you wore that one time you went to the U2 concert. Truth is, you’re never going to wear that skirt again, and when you do lose that excess 9lbs, you’ll be updating your style anyway and still won’t be wearing that dress. So chuck it. Just do it, you will have so much more headspace and an excellent excuse to go shopping. There is something absolutely cathartic about an organised home. Here are some experts’ tips:
Lay out all your clothes on the bed
Sort them into piles – work, weekend, going out
Once again into piles you’ve won in the last month, 6 months and year
Sort them one more time – keeping, not sure, donate/sell
If you haven’t worn it in two years, donate or sell it. Don’t be emotionally attached. Unless there are genuine sentimental reasons. Obviously.
Spring Cleaning: Electronics
First of all, throw away the packaging. Some people keep the packaging for items they’ve bought just in case they need to return it. Go through the loft with all those empty boxes. Recycle the boxes of any appliances with expired warranty.

Source: Ali Express
Next, recycle electronics that don’t work and can’t be fixed. And use cable clips to organise your wires.
Spring Cleaning: Everything else
The principle is the same. Go through your drawers, shelves and cupboards to find recyclable items. Over the years, we tend to gather clutter that we won’t use, but somehow are attached to. Organising your home is one of the first steps to organising your life.
Source: Kmart
Dusty pink or else called “millennial pink” or “rose quartz” was the colour of the year for 2017, 2016 or as far back as 2014 depending on who you ask. No doubt this colour has been about for a while. Even though it’s reached its peak in 2018, what happens to all of us who went out and bought dusty pink furniture, painted our walls pink, or changed all our bed linen to some variation of dusty freakin’ pink? We’ve collected pics from all over the web showing different ways to update your use of pink throughout your home.
Dusty Pink and Grey Bedroom

Source: Doctor Kish
This bedroom uses pink to contrast the main white and grey colours. Pink doesn’t necessarily have to be overwhelming. Just a touch of it can go a long way. Here, a blanket is enough.
Dusty Pink and Grey Living Room

Source: Styleroom.se
This living room is another great example of a style that uses touches of pink, rather than making it the main colour. There are also hints of metallic rose gold, which achieves the same effect, with a different spin.
Pink and Grey Art

Source: Living Room Ideas
Sometimes art is all you need to introduce this colour into your living room’s style.
Pink Bathrooms

Source: House Beautiful
This all pink room does the business. It’s a great idea for a guest bathroom, where the loud but not overwhelming colours can be a nice surprise, an escape even. Using different shades of the same colour achieves this effect.

Source: The Spruce
Here a delicate balance is achieved using grey, pink and teal.
Dusty Pink Furniture and Walls

Source: Brissi

Source: Circal Lighting
Finally, this simple, modern design uses varying shades of pink to bring the room together
Tips for luxury Living
Luxury is less about what you spend than how you feel. You can make you living room feel more like a luxury hotel with these 9 simple tips.
Make Luxury Statements
Centre Pieces
Choose a statement coffee table that looks expensive. It may look expensive, but it doesn’t have to be. It’s amazing what you can find if you wander through thrift shops and Saturday markets. You can find re – purposed or vintage furniture that

Source: Pottery Barn
Statement Wall
A statement wall will also do the job of making your living room look insanely expensive. Statement walls are designed to draw the eye, and they’ll make you feel like your home was styled by an artist! Make statements using art, mirrors or even plants.

Standing lamps and study or reading corners make a statement about how you live. A corner to relax in can actually in itself be relaxing and luixrious.

Use Metallics
Metallics are in style right now. Adding copper or gold touches to your living room can give a feeling of luxury chic.
Go Retro
Key retro pieces can also make a serious luxury statement. They say that you’re clued up and confident in your own style.

Mix Textures
Luxury is all about comfort. But too often when it comes to cushions, we focus on picking different colours. Use a mix of patterns, colours and textures to change things up. It will go a long way towards that warm, comfortable home that’s worth living in.

Add Plants
We’ve talked extensively about plants and how they make a difference to the feel of your home.

Add Culture
Travelled recently? Picked up a sculpture or two from a market in Casablanca or an art fair in Accra? Don’t leave them in your loft or storage cupboard, add them to your living room strategically to help you go down luxury lane from time to time.

Our blog is now on bloglovin and can be added to your collection of favourite blogs. Follow us for our weekly updates on all things homely and lovely.
Follow my blog with Bloglovin
How to be Warm: The Perfect Comfort Food

How to be Warm: Whiskey Apple Crumble Pie
It’s cold and rainy outside, but you don’t have to stay grey and miserable because of it! Take this chance to bake something warm and delicious, that’ll also cheer you up. Warmth doesn’t only come from boilers and radiators.
Ingredients
For the Crumble:
3/4 cup of flour
1/2 teaspoon of ground cinnamon
1/2 cup of crushed pecans
1/4 cup of brown sugar
1/4 cup of white sugar
1/2 teaspoon of salt
6 tablespoon of butter
Filling:
2 pounds of tart,
Crisp apples
2 tablespoons of whiskey or bourbon
1/2 teaspoon of cinnamon
Pinch of ground cloves
Pinch of ground nutmeg
Pinch of salt
1/2 cup of light brown sugar
3 tablespoons of melted butter
3 tablespoons of flour

Instructions
Make the pastry, form the crust and chill it in the refrigerator.
Preheat your oven to 240 degrees C.
The Pecan Crumble:
Put all the crumble ingredients (except the nuts) in a food processor and blend until the mixture looks like breadcrumbs. Or, if you prefer to make the crumble by hand, cut the butter into the flour with a pastry cutter and finish by rubbing in the butter with your fingertips until it looks like breadcrumbs.
Then, stir in the sugar and everything else. Add the nuts and chill the crumble until needed.
Peel and remove the apple cores. Slice the apples thinly, about a 1/4 inch. Lightly sauté the fruit in butter to avoid making a dried up pie.
Add all the ingredients for the filling on top of the apples and toss gently until everything is coated evenly.
Fill the pastry crust with the apple mixture.

Then sprinkle on the Pecan crumble.
Bake the pie on a lipped cookie tray for 10 minutes or until the crust looks dry, blistered, and blonde. Turn the oven down to 180 degrees C, and bake at until the crumble browns and the apples yield when pierced with a knife, and the juice is bubbling thick at the edge of the pie—approximately an hour.
Cool completely before cutting, at least a few hours.
Cool it for at least a couple of hours before cutting it to serve. Serve at room temperature.
Store it uncovered so that the pastry can breathe at room temperature for up to two days.
We discovered this on vogue.com. Enjoy this warming recipe before you reach for your thermostat to turn the heating up!
House plants you’d love!
Picture Source: Home Design Rev
We were inspired by this video from apartmenttherapy.com and we were inspired to look into the best ways to look after various house plants.
Here’s a handy list of house plants you can buy and look after yourself, especially if you haven’t got green fingers.
House Plants – Montsera
Also known as the Swiss cheese plant. Originally from the rain forests of Central and South America, they can grow up to 20 inches.
Care Tips: Store them in a place with indirect bright light and a room of average warmth. You’ll need to water it frequently while it’s growing. Make sure you let the compost dry out a little bit between watering and mist it with a spray bottle when watering, rather than simply pouring water over it. You can feed it with a liquid feed once a month to keep it healthy. If you notice water dripping from the leaves, that means it’s been overwatered, so it’s important that the compost does dry before you water it again.
Source: House of Plants
Snake Plant
There are up to 70 different species of snake plant, so do your research carefully before making your purchase. The plants originate from parts of Europe, Africa and Asia. They’re really straightforward to look after and you can leave them be for weeks and they’ll still look fresh. According to research, snake plants can be really good for the atmosphere in your home – cleaning the air and removing toxins.
Care Tips: Put them in direct sunlight to get as much light and heat. In winter, avoid watering them too much – let them dry out a bit between waterings to avoid plant rot.
Source: Gardening Know How
Air Plants

Source: NY Times
Air plants are also known as epiphytes, which means they can grow without dirt. Often, they attache themselves to rocks and shrubbery. They’re native to Southern US states, Mexico, Central and South America. Air plants that have silver foliage tend to be resilient and so can survive for longer without your constant attention. If the plants are greener, they could dry quickly. Store them somewhere warm, but away from direct sunlight.
Care Tips: They’ll need lots of air circulation, so hang them from the ceiling if you can. Water them once a week by placing them in the sink and rinsing lightly. Leave them to drain overnight before putting them back in their permanent place.
Source: BHG
House Plants Devil’s Ivy
It’s a tropical plant native to the Solomon Islands. It can grow to 20 or even 40 feet in its natural habitat, but in your house/flat it will probably grow to 8 feet if looked after well. Place them in a hanging basket so the look their best.
Care Tips: Put it near a window, but away from direct sunlight. Try using blinds or a sheer curtain if you’re going to place them near a window. If you notice that the yellow spots are starting to fade, it means that the plants aren’t getting enough light. Don’t place it near a vent or radiator and if you have pets, it might be a good idea to choose a different house plant. If you’ve got a cat, keep them away from your plants as devil’s ivy can be poisonous to cats.
Source: Homeguides
Fiddle Leaf Tree
Another tropical plant, this one’s native to West Africa, Cameroon and Western Sierra Leone where it normally grows in lowland tropical forests. It’s perfect as a house plant because even though they thrive in warm, wet conditions but they’re also resilient, so they can survive in less than ideal conditions too. Being large and leafy, they’d look best on the floor in a standing vase where they can have room to grow up to about 6 feet.
Source: The Spruce
Rubber Tree Plant
They can grow to 50 feet tall – which may be slightly inconvenient in your living room! To keep them a manageable size, you can train them to be houseplants by cultivating young rubber plants.
Care Tips: They need balanced conditions, i.e not too much light, not too much warmth and not too much water. House them near natural light, but away from direct sunlight. Here, sheer curtains will come in handy again. Light moisture is also better than direct watering. Try wiping the leaves with a damp cloth or using a spray bottle to mist the plant. if the leaves start turning yellow or browning, it means they’ve been overwatered so wait for them to completely dry before watering them again.
Source: Gardening Know How
Spider Plant
This plant is extremely easy to grow and look after. It is suitable for a wide range of conditions and the only thing you need to look out for are brown tips. They’re an excellent choice as house plants if you’re new to gardening. Similar to most plants, they need bright but indirect sunlight and plenty of water. Although, be careful not to let them get too soggy in order to avoid root rot. Similar to some of the other plants in this post, let them dry out before watering them again. Don’t place them near any heat sources because they prefer cooler temperatures.
Source: Gardening Know How
Succulents
Succulents are dormant in winter, so they can make the best house plants this side of the equator. Keep them as close to the window and possible, so they can get the sunlight they need to grow. If they start stretching, it means they’re not getting enough sunlight. If this happens, simply cut off the ends to propagate them. Learn more about propagation on the succulents and sunshine website.

Staghorn Fern
Like quite a few of the house plants featured in this post, they tropical plant also hails from South America. However, various species can also be found in natural tropical areas in Africa, South East Asia, Philippines, Australia and New Guinea. Like air plants, they’re also epiphytes which means they’re most decorative in your home as a hanging plant. Here, direct sunlight for 4 – 7 hours a day is needed. They’re tropical plants, so humidity is needed. You’ll needed to submerge the entire root system in water in order to water them occasionally. Water them less frequently in winter.
There you have it! We hope these tips are useful and you’re able to bring some revival to your home decor this winter by adding plants to revive your space.
Source: Plant Care Today